Adding tags to your call will help you to identify and recognize your calls in an easier way; it also helps you to find and filter your calls effortlessly. This feature is designated for Professional service plans and above. This article will instruct you how to create and add a new tag on Gcalls.
A. Create, edit, delete and add tags to your calls
1. Create, edit and delete tags
Default setting: only Admin can create, edit and delete tags and agents can only assign tags to calls. Admin will have to grant permission for agents to perform these actions.
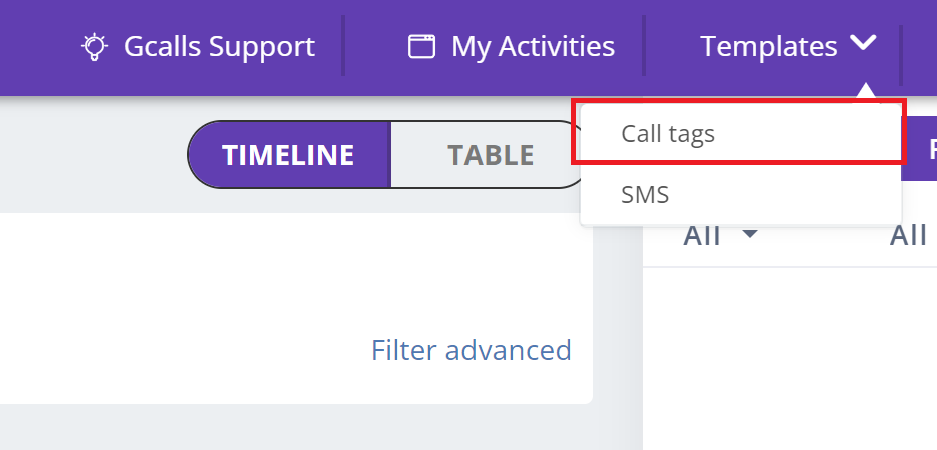
Choose “Templates” on the taskbar on the main screen => Choose “Call tags”
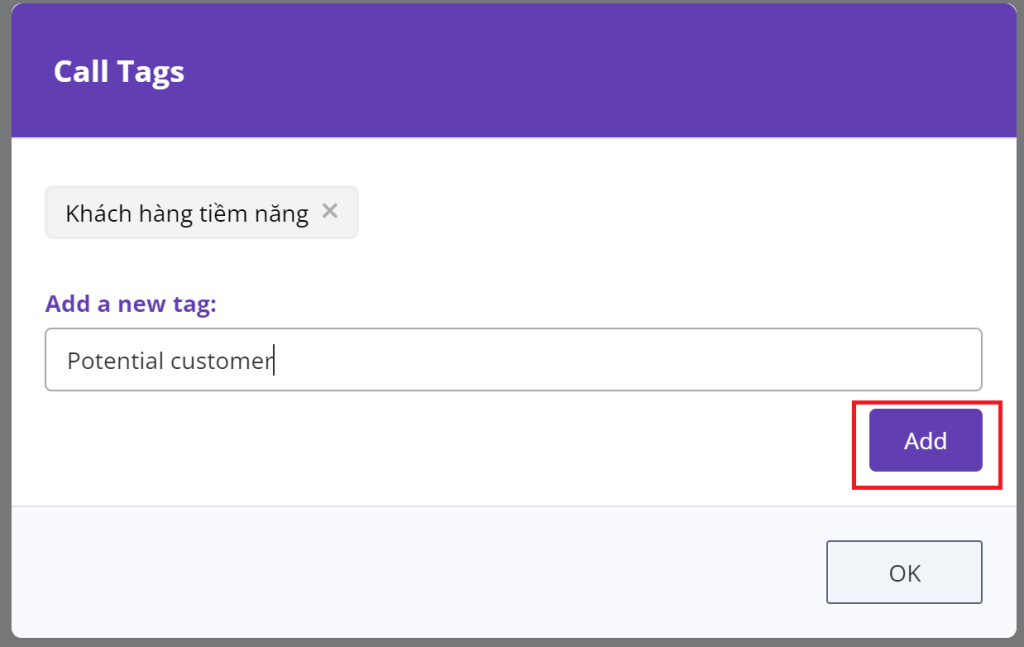
 – Create a new tag: type the name of your new tag => Choose “Add”
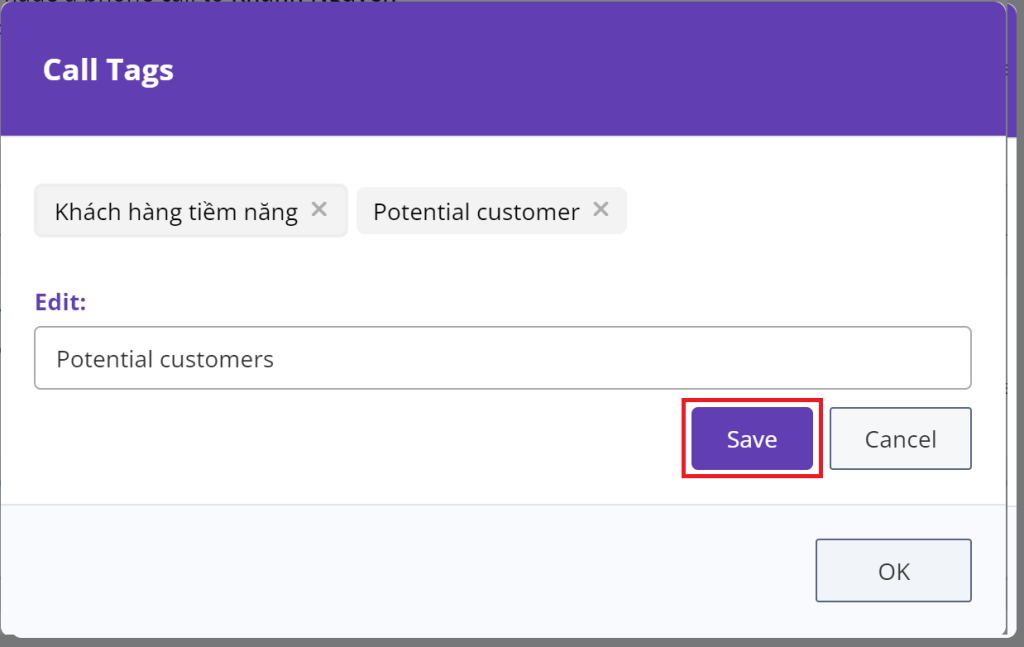
 – Edit current tags: Click on the tag that you want to edit => Enter new tag name => Choose “Save”
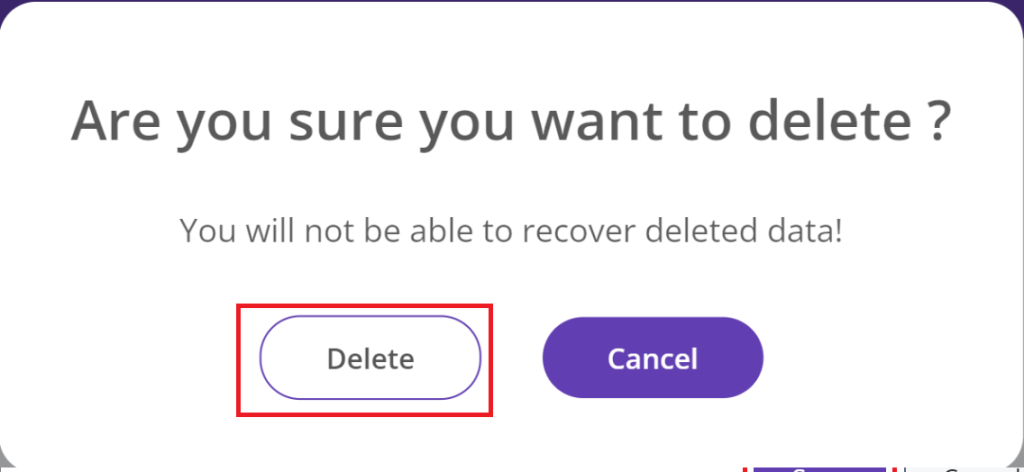
– Delete current tags: Click the icon “X” next to the tag you wish to delete => Choose “Delete”
2. Add tags to a call
To add tags to a call, you have to:
![]()
You can add multiple tags for one call. You can also use the “Select All” or “Deselect All” function for quicker actions.
B. Filter call tags
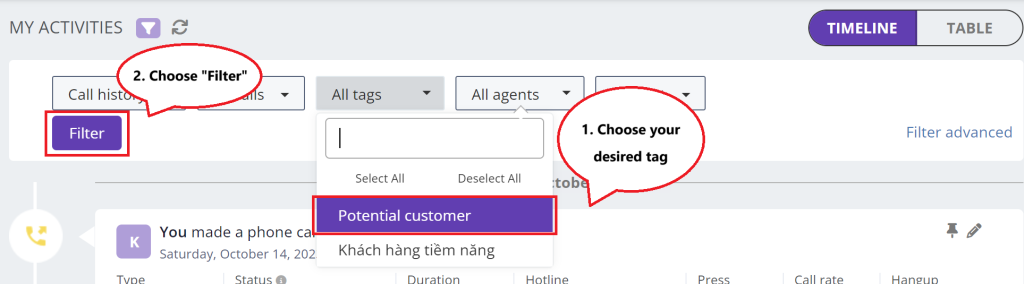
1. Filter call tags on the main screen
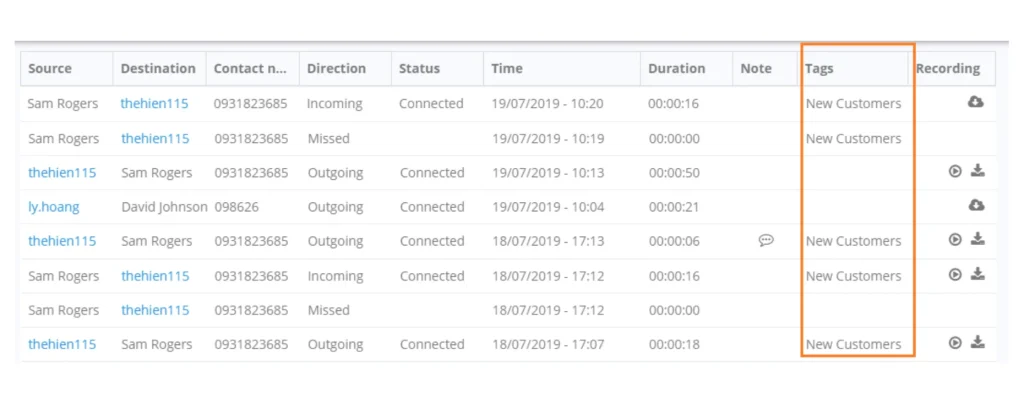
2. Filter call tags on the management screen
On the management page, Admin can view all calls with tags using the call history table.
You can also view this page to understand more about managing call tags in the Management page: Sort and export call history
Last modified: พฤศจิกายน 12, 2023